When you're coming from the Java world to the Node.js ecosystem like I did, you will struggle a bit in the beginning. It's a constant back and forth and not everything I tried was a good one.
As I already explained in my previous article, I finally ended up with a project setup of NPM, TypeScript, and Nest.js.
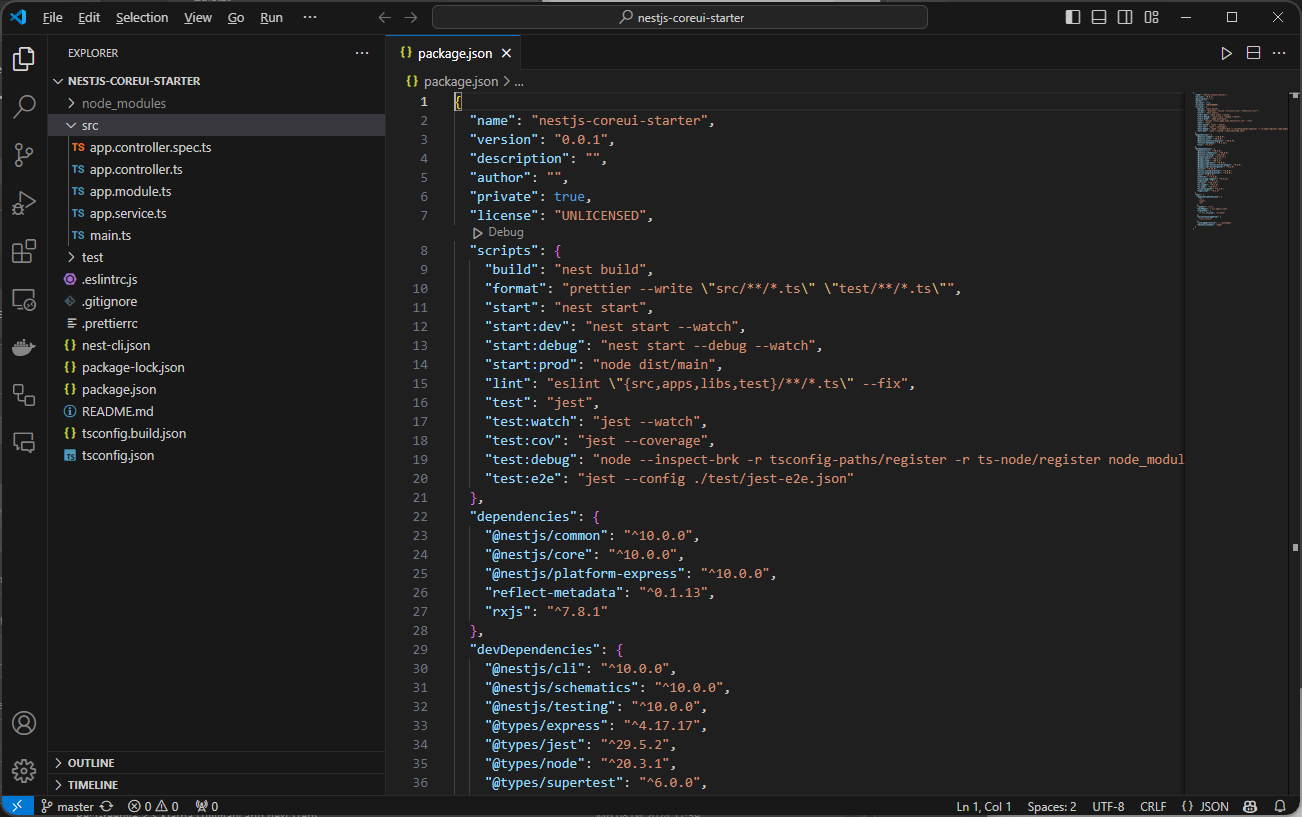
The Nest CLI provides you with great possibilities to quickly scaffold your new project and create boilerplate code. After selecting a package manager (one of npm, yarn, pnpm), the CLI generates a full-contained web application:
nest new nestjs-coreui-starter
will generate that structure for you:
That code contains one simple AppController, which gets an AppService injected - when you run npm run start:debug, you will see Hello World! printed as a response to http://localhost:3000.
Good to go for the start, but if you want to create a real web application, there is some stuff missing and in that blog post I'd like to guide you through my approach.
Editor Config
No matter if you are in a team or not. Before you start a project, agree on a configuration for your IDE Editor how to format your files. The open-source project EditorConfig provides a syntax that works fine across IDEs and programming languages.
I don't wanna get into the "2 vs 4 indent" or "tabs vs space"-flamewar. All is good as long as everyone on the project does the same.
In my case, the .editorconfig looks like this:
[*]
charset = utf-8
end_of_line = lf
indent_style = space
indent_size = 4
insert_final_newline = true
trim_trailing_whitespace = true
That file will later be picked up by our infrastructure to ensure that all files are formatted in the same way. You can already right away execute npm run format, and all your source files will be formatted accordingly.
I'd also recommend updating your package.json in the scripts tag to also format .jsonand.js files in the root directory:
"scripts": {
   "format": "prettier --write \"src/**/*.ts\" \"test/**/*.ts\" \"*.json\" \"*.js\"",
}
Control dependencies
The Nest.js CLI generates a package.json which denotes dependencies like this:
  "dependencies": {
    "@nestjs/common": "^10.0.0",
    "@nestjs/core": "^10.0.0",
    "@nestjs/platform-express": "^10.0.0",
    "reflect-metadata": "^0.1.13",
    "rxjs": "^7.8.1"
  },
As I'm a Java guy, I asked myself what the ^ means, and thankfully we do have ChatGPT now that can help immediately.
In a package.json file, the ^ symbol preceding a version number indicates that npm (Node Package Manager) should install the specified package with a version that is compatible with the specified version, up to the next major version.
For example, if you specify "some-package": "^1.2.3", npm will install version 1.2.3 of "some-package" or the latest minor or patch version that is backward-compatible with 1.2.3. So, it might install versions like 1.2.4, 1.3.0, 1.4.0, etc., but it won't install version 2.0.0 or higher, as those might contain breaking changes.
This caret symbol is part of npm's semantic versioning (semver) scheme, which aims to provide a standardized way of declaring and managing dependencies in Node.js projects.
So I had a look in the package-lock.json and I found an entry like this:
"node_modules/@nestjs/common": {
   "version": "10.3.7",
   "resolved": "https://registry.npmjs.org/@nestjs/common/-/common-10.3.7.tgz",
   "integrity": "sha512-gKFtFzcJznrwsRYjtNZoPAvSOPYdNgxbTYoAyLTpoy393cIKgLmJTHu6ReH8/qIB9AaZLdGaFLkx98W/tFWFUw==",
   "dependencies": {
      "iterare": "1.2.1",
      "tslib": "2.6.2",
      "uid": "2.0.2"
   },
}
So the version ^10.0.0 in my package.json installed ^10.3.7. That also means that a subsequent call of npm install could install a new version of a dependency without any code change on my side.
To get reproducible builds on your CI server, you should therefore run npm ci instead of npm install, which will not install new dependencies but always take the ones from package-lock.json, but I still do have some bad feelings there.
Call me old-fashioned, but I want to have control over the exact version that is being installed, therefore I stripped all occurrences of ^ in my package.json. That requires a bit more manual work, but now dependency upgrades are a manual thing that gets into my daily routine when calling npm outdated.
If you are using Visual Studio Code, you get a nice popup over each dependency showing you the latest version:
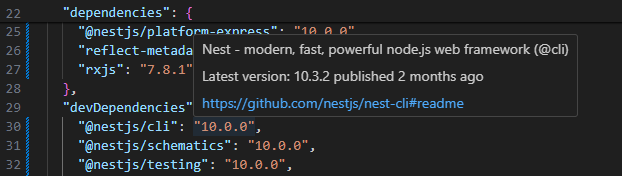
So when you remove the ^, ensure that you replace the version number with the previously installed version.
Keep dependencies up-to-date
So let's ensure we have the latest version of all dependencies. I have seen so many projects in the past with really outdated and unsupported libraries that made it really hard to do any upgrades. If you work on that regularly, it's not a pain at all.
NPM provides a great command that tells you for which library there exists a newer version
npm outdated
Depending on the version of your Nest CLI you might get an output like this:
Package                           Current  Wanted  Latest  Location                                       Depended by
@typescript-eslint/eslint-plugin   6.21.0  6.21.0   7.6.0  node_modules/@typescript-eslint/eslint-plugin  nestjs-coreui-starter
@typescript-eslint/parser          6.21.0  6.21.0   7.6.0  node_modules/@typescript-eslint/parser         nestjs-coreui-starter
eslint                             8.57.0  8.57.0   9.0.0  node_modules/eslint                            nestjs-coreui-starter
reflect-metadata                   0.1.14  0.1.14   0.2.2  node_modules/reflect-metadata                  nestjs-coreui-starter
Update the versions in your package.json accordingly and run npm install, until the result of npm outdated is empty or there are any version upgrades that you don't want to or can't go.
So after doing all that, the dependencies and devDependencies section of my package.json looks like that (you can also explore the full git diff):
  "dependencies": {
    "@nestjs/common": "10.3.7",
    "@nestjs/core": "10.3.7",
    "@nestjs/platform-express": "10.3.7",
    "reflect-metadata": "0.2.2",
    "rxjs": "7.8.1"
  },
  "devDependencies": {
    "@nestjs/cli": "10.3.2",
    "@nestjs/schematics": "10.1.1",
    "@nestjs/testing": "10.3.7",
    "@types/express": "4.17.21",
    "@types/jest": "29.5.12",
    "@types/node": "20.12.7",
    "@types/supertest": "6.0.2",
    "@typescript-eslint/eslint-plugin": "7.6.0",
    "@typescript-eslint/parser": "7.6.0",
    "eslint": "8.57.0",
    "eslint-config-prettier": "9.1.0",
    "eslint-plugin-prettier": "5.1.3",
    "jest": "29.7.0",
    "prettier": "3.2.5",
    "source-map-support": "0.5.21",
    "supertest": "6.3.4",
    "ts-jest": "29.1.2",
    "ts-loader": "9.5.1",
    "ts-node": "10.9.2",
    "tsconfig-paths": "4.2.0",
    "typescript": "5.4.5"
  },
That way I immediately see my peers, and I don't need to crawl inside package-lock.json.
Linting
The Nest.js CLI provides you with initial support for linting your code with ESLint. That is a good starter, but the ruleset did not fulfill my needs, so I added some plugins and extends.
My old colleagues from Cloudflight are providing a great starting point with sample rules, and I also added another plugin to sort imports.
npm install --save-dev @cloudflight/eslint-plugin-node
npm install --save-dev eslint-plugin-simple-import-sort
And then adapt the plugins and extends section of your .eslintrc.js as follows:
  plugins: ['@typescript-eslint/eslint-plugin', 'simple-import-sort'],
  extends: [
    'plugin:@typescript-eslint/recommended',
    'plugin:prettier/recommended',
    'plugin:@cloudflight/node/recommended',
    'plugin:import/typescript'
  ],
If you now run npm run lint again, you will get a lot of errors. I have decided to disable some of those rules, let's go through them step by step:
C:\github\klu2\src\nestjs-coreui-starter\src\app.controller.spec.ts
  1:37  error  "@nestjs/testing" is not published      node/no-unpublished-import
This rule is complaining that we are importing @nestjs/testing here but don't publish it. True, because this is a devDependency and we only need it in Spec-Files. The best way I found is to disable this rule in all *.spec.ts files inside .eslintrc.js:
overrides: [{
files: ['**
Then there are a couple of rules that don't make sense in Nest.js projects like @typescript-eslint/no-extraneous-class (it fails for each class without members, but this is how Nest.js modules are designed) and also some that I believe do make code unnecessarily bloated (like no-magic-numbers or @typescript-eslint/explicit-member-accessibility), so I deactivated those.
Run npm run lint again and you will find some more errors:
C:\github\klu2\src\nestjs-coreui-starter\src\app.controller.spec.ts
  0:1  error  This rule requires the `strictNullChecks` compiler option to be turned on to function correctly  @typescript-eslint/strict-boolean-expressions
  0:1  error  This rule requires the `strictNullChecks` compiler option to be turned on to function correctly  @typescript-eslint/prefer-nullish-coalescing
We will temporarily turn off those rules as well now so that we can commit our changes, but we will fix that in a minute.
Adapting TypeScript configuration
The default tsconfig.json that comes with the Nest.js CLI is quite progressive in some areas, meaning it allows some code flaws that could make your code end up in serious crap. I used the default configuration for some weeks and had to tidy up the code and found a lot of bugs that could have been detected with a more strict configuration.
Specifically, the default configuration switches off the following checks:
 "strictNullChecks": false,
 "noImplicitAny": false,
 "strictBindCallApply": false,
 "forceConsistentCasingInFileNames": false,
 "noFallthroughCasesInSwitch": false
I'd recommend switching them all on from the very beginning. We may argue about noImplicitAny, because that could come in handy sometimes, but I don't see any reasons, why to switch off the other checks. They really help you a lot during development time, avoiding bugs from slipping into production. You can review the according commit here.
Specify Node version
The last thing you should do right from the start is to configure the minimum Node.js version that is required to run your application. This is important if your codebase is relying on native functionality that entered Node.js just recently, like the native fetch API which became stable in Node 21.
You can easily specify that in your package.json by adding the following block:
"engines": {
    "node": ">=21.0.0"
},
Code
If you are interested in the code, you can clone the whole repository from https://github.com/klu2/nestjs-coreui-starter. Please note that this repository will change over time as I will be using it for subsequent blog postings.
Summary
We are good to go now, we do have a clean project that goes beyond the default scaffold from the Nest.js CLI, including:
The next blog posts will then focus on a clean module setup including the view layer.
Disclaimer
As mentioned some times already, I'm an absolute beginner in the Node.js ecosystem. I gave my best to apply my 2 decades of Java knowledge to this new world, but for sure there are also more elegant ways.
If you have ideas on how to improve that setup, please send me a comment here or do a pull request on GitHub.
I am happy for every constructive input!


